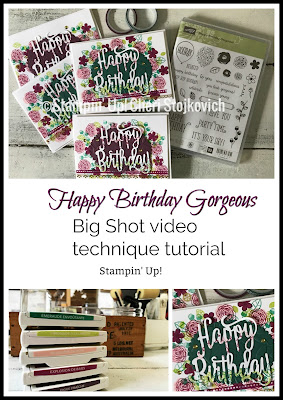
Love this stamp bundle – hope you do too! First I am going to show you a couple of fun tips and then check back in a day or so for the full tutorial video.
The bundle used in this card is Stampin’ Up’s – Happy Birthday Gorgeous.
It’s just what you need in a set – some unique words (in such a fun font) – matching 2 punches – balloons, florals and coordinates with one of the few individual dies. In the catalog it is featured with the new Foil Frenzy papers. I have already told you how much I love those! Go grab your paper catalog now and flip to page 77 to see what I mean! (Don’t have a catalog you can hold in your hands? Let me know and I can fix that for you….)
Here are the colors I used on this week’s 3 minute video card. When I attach the stickers to my new stamp pads of course I put the English sticker on one end. Then – I choose one of the other language stickers to add to the other. Two reasons for this: If the pads are facing the opposite way then I can still see what color it is. AND – it’s just fun! The names (especially in French!) are just fun. Say them out loud while you stamp and it will bring a smile to your face. I promise.
Fun Fact: The languages represent the countries that Stampin’ Up! has demonstrators!
It is kind of hard to see in the pictures – but I wanted to highlight the way I created the Happy Birthday Thinlit on the cards. I used the multipurpose adhesive sheets. These make adhering the finer thinlits and dies super easy as they basically turn your pieces into a sticker. It also provides some additional stability as I stamped the bottoms of the letters.
After running through the Big Shot I tried to not pull the words out from the paper. It is so much easier to stamp when it was connected to the scrap piece. This is one of the things you make that pretty much looks awful…..til you are done! Once you pull it apart and mount it on a darker color, you will love your results!
Product List
Links by TheseAreMyStamps.com


Leave A Comment